Introduction
Welcome back to our blog series, “The Ultimate Guide to Dental Implants,” brought to you by New Smiles. In our previous posts, we’ve explored the fundamentals and qualifications necessary for dental implant doctors. Now, we’ll guide you through the entire dental implant procedure, helping you understand what to expect from start to finish.
Dental implants are one of the most effective and long-lasting solutions for missing teeth, and knowing the procedure can greatly alleviate any anxiety you might have. Here’s a detailed overview of the steps involved in receiving dental implants.
Step 1: Initial Consultation and Evaluation
Your journey towards dental implants begins with a comprehensive consultation. During this appointment, our experienced team will evaluate your oral health, take necessary records, including a CBCT, perform an oral exam, and discuss your medical history. We’ll assess the condition of your bone to determine your eligibility for dental implants. It is important to bring a list of questions, medications, and a spouse/significant other or another financial decision-maker to this appointment.
Step 2: Treatment Planning
Once we have gathered all the required information, our dental professionals will create a personalized treatment plan. This may involve planning for extractions, sinus lifts, and/or bone grafts to prepare your mouth for the implant or implants.
All treatment options and costs for each will be discussed as well as your desired goals. This is a good time to ask your questions or share your concerns.
Step 3: Records
After deciding on your treatment, if only a single implant or two are needed, a dental team member will take a digital impression or scan of your mouth or have you come back at another convenient time. This is an important step because the scan is combined with the CBCT technology to have a surgical guide fabricated. (A surgical guide ensures accurate and successful placement of your implant during surgery.)
If your treatment plan consists of full-mouth implants, then a team member will schedule you back to take a few additional records to help create the full-mouth surgical guide as well as your post-surgery provisional prosthesis (your new smile!) and go over any additional questions you may have. Sometimes it will be necessary to consult your Primary Care Physician and/or get lab work done prior to surgery.
Step 4: Implant Placement Surgery
We’ll schedule your surgery when you’re ready for the implant placement. To ensure your comfort, this procedure is typically performed under local anesthesia for single implants and under IV sedation for more extensive cases. The doctor will use the surgical guide for accuracy in implant placement. The titanium implant/s are placed into the bone by our dental implant specialists. After placing a single implant, a healing cap may or may not be placed depending on the situation. If several implants are placed, as in an All-On X case, the gum tissue will be stitched up, and a provisional prosthesis will be placed so you will have a new smile upon leaving the office.
You’ll receive detailed post-operative care instructions. With a single implant you will be back to your daily activities immediately. With full arch cases, healing varies, but most patients take it easy for about a week. Patients undergoing IV Sedation will need a ride home and to be monitored for 24 hours. Post-op visits are scheduled to ensure healing is successful and any concerns are addressed.
Step 5: Osseointegration
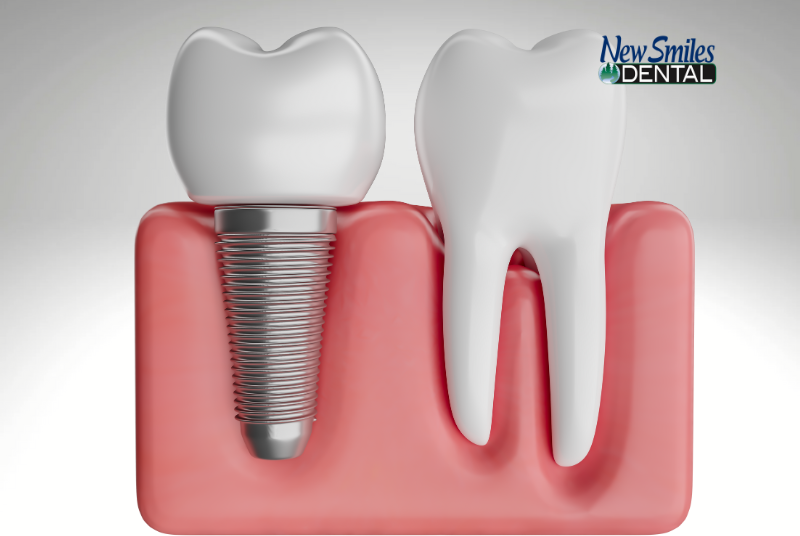
Following the surgery, a critical phase known as osseointegration occurs. During this healing period, which typically lasts several months, the titanium implant will fuse with your jawbone, creating a strong and stable foundation for your new tooth or teeth. Maintaining good oral hygiene and diligently following all post-operative instructions during this period are vital for successful healing.
Step 6: Abutment Placement
For single implants, once osseointegration is successfully completed, we will schedule a second minor surgery to uncover the implant and place the healing cap or abutment on top of the implant. The abutment serves as a connector between the implant and your replacement tooth. After the abutment is placed, you’ll have a short healing period for your gums to recover before the final restoration (crown).
Step 7: Final Restoration or Prosthesis
Finally, it’s time for the placement of your custom-made crown. We often make your crown in-house or send it to a lab for a more customized color, shape, and size to match your natural teeth. Once the crown is fitted and placed, we’ll make any necessary adjustments to achieve a perfect bite and appearance. Your implant is now ready to function like your normal tooth.
If you have had an All-On X procedure, our in-house lab technicians will craft a final prosthesis consulting you on the shade and shape of your new smile. Our dental hygienists will guide you on proper care and maintenance as well.
Conclusion
We hope this detailed walkthrough of the dental implant procedure has provided you with valuable insights. At New Smiles, we are dedicated to making your journey as seamless and comfortable as possible. If you have any questions or are ready to explore dental implants further, please don’t hesitate to contact us. Schedule your complimentary consultation today and take the next step towards restoring your smile with our dental implant specialists!
Blogs in Series: 1. The Basics 2. Types and Benefits 3. Qualifications 4. This Article 5. Coming Soon


